

February 22, 2014
In photography class, last Thursday, we learned how to retouch photographs in Adobe Photoshop. It is useful for a little retouching when doing portraits, but it is crazy how much faces can be distorted!
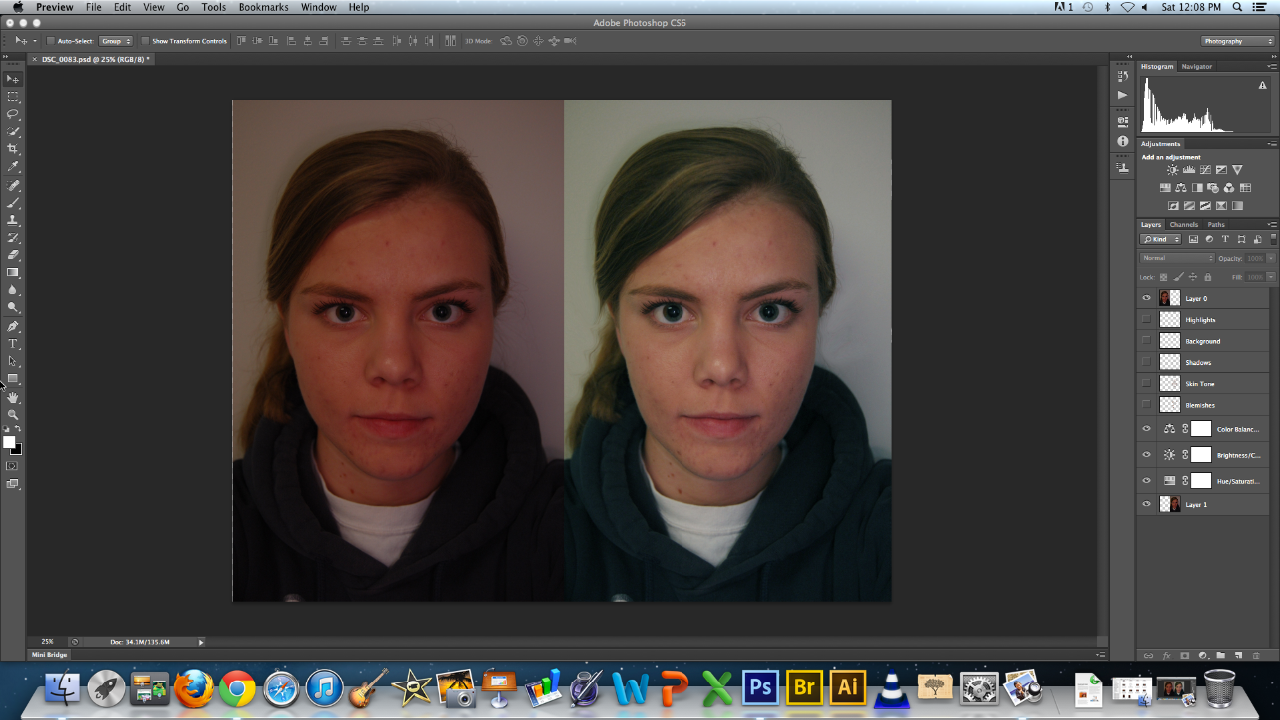
So here is my quick (40 min) photoshop experiment with my own face:
I. Liquify

2. Color adjustment
3. Spot Healing

4. Clone Stamp
The clone stamp tool duplicates specific areas of the photo. On low opacity, you can use the clone stamp as a foundation powder; it smooths skin tone.

5. Shadows for Contouring
Using a black paint brush with a really low opacity you can create extra shadows to help morph a face.

6. Highlights

I could have done a lot more to clean up this photo: the highlights and shadows could be cleaned up a lot, fly away hairs could have been removed, and a lot more. But the computer I was using at the library started freezing and I had plans to go eat waffles with my roommates, so wasting more time on a creepy barbie face wasn't worth it :) It was fun using photoshop though, my next assignment in photography is doing two portraits. I definitely won't use photoshop to this extreme! I don't like the idea of morphing someone's face shape, I'll probably just use certain tools sparingly.
